
You are currently browsing the tag archive for the ‘Before and after’ tag.
Hi friends! It’s been a little while but I can feel the interest and inspiration for decorating & DIY creeping up on me again. The only difference is that now my decorating budget is even smaller, haha sigh…
When I think of the projects we have going, most of them are creeping forward at a very slow pace – the granny flat, refinishing the windows, various minor house decor tweaks. Much too boring to blog about. I have a few awesome things to share in the weeks ahead as I work on some more interesting ideas, but right now I do have one great project to tell you about – our backyard!
Here’s the motivation for putting a fenced backyard onto our property.

She recently turned one, and she’s been walking for two months now. Baby needs a safe place to roam where I don’t have to be standing over her every second to keep her safe. Because this is the backyard before.


Not really safe for a little one to run around, and so many sharp/dangerous things to climb on or put in the mouth, so the Chief did a blitz backyard 1000% makeover in two weeks. Two weeks people!! He is a star. He just decided that if we were going to make a yard, we were going to put down sod and have it ready for the Cinco De Mayo party we had planned.
Step one: well really step one was install the fence but I forgot to take any pictures. We got simple 3′ squared off black iron fencing from Home Depot which was one of the cheaper options they had, and also isn’t so enclosing as to stop the sightline to the rest of the property. The yard still feels big.
Step one that I have a picture of was to put down a truckload of composted chicken manure. This stuff smelled kind of bad for a few days until all the ammonia had evaporated, but it is the best for growing things – I wish I’d thought to keep some for my veggie garden but when the Chief gets a wild hair he just goes for it till the project is done, and I didn’t really have time to think of that till it was too late.

We watched. It smelled.

Later on I helped shovel it around the whole yard with Miss E on my back. You can see the gate here – a friend made it by hand and the Chief has been storing it in the shed for years now. Amazingly, it fits perfectly with the rest of our fencing system!

Then the Chief rototilled the manure into the soil so everything was nice and deep and loose for roots to take hold.

Lastly, he used a wide pushbroom to make everything flat and level.

I didn’t get pictures of the next two steps, which were laying the sod and putting in the last sections of fence. It’s important with sod to really wedge the edges tightly against each other when you install it, so that you don’t get gaps or dead edges. The Chief did a really great job with that. Lastly, he installed a small area of redwood decking to put the barbecue on and open up the patio, with two redwood steps leading down to the lawn. It makes such a difference to the finished feel of our yard.
Here’s the patio! The house exterior has work yet to be done but the yard is soooo amazing already.

Here’s another view where you can see how the Chief put in a tall wooden fence with a locking gate in between the shed and our house. On the other side of that will be the granny flat’s little enclosed front yard, so we’ll both have privacy. The back yard is amazing and we all use it and enjoy it every day. We were able to keep costs down by borrowing all the heavy equipment we used and by DIY of course! Sod cost about 4x what seed would have cost, but the Chief wanted grass for the party and it wasn’t that big an area to do after all. Now that it’s established it only takes about 4 minutes of watering every day, even in the crazy heat we’ve been having. Oh yes, the Chief installed the sprinkler system himself too!
Any tips on backyards with little kids and maybe (hopefully) getting in some garden beds? What have you done to make a haven of your yard for your family?
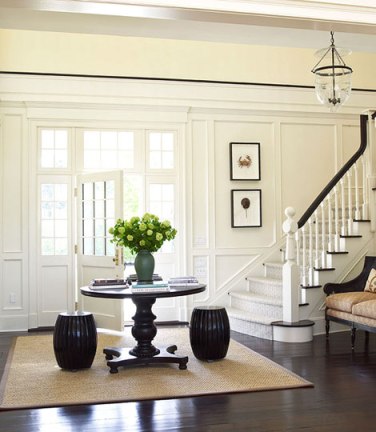
And now, the moment we’ve all been waiting for – I am ready to show you pictures of the new and improved living room! The impetus for all these little changes was the fact that, with no dedicated nursery, I found myself changing Miss E on the floor in the middle of the living room… and realized I didn’t really want to be doing that for the next two years.

BEFORE
I redid a thrift store lamp to make a pair of navy blue lamps on either side of the loveseat, moved the diaper station to the new entryway console, and replaced the office-y brown rug with a synthetic sisal rug.
Here’s what this view looks like now. No more diapers in the middle, hurrah :)

AFTER
I love the new rug!! It’s not the most noticeable change in the photos, but it adds quite a bit of texture to the atmosphere. Here’s a side by side comparison of the old rug (left) getting rolled out of the way for the new rug (right).

The rug is baby-approved too.

My next problem area was directly across from the front door. This is what you saw coming into the house.

BEFORE
I moved the grandfather clock to the dining room, where it has finally found a permanent home. It’s been all over and it never quite looked like it belonged until it arrived at its newest spot.
I turned the desk 90 degrees so as not to have everything on that wall shoved up against it in a line, tweaked the spacing of the printer stand to create a more defined office spot, and moved in a tall bookcase where the clock used to be. I hid the worst of the cords with some wraparound cord binder (not sure what that stuff is called). The stroller is not bee-you-tiful but it has a good, handy home in the corner now.

AFTER
Here’s another shot with some more of my “before” issues.

BEFORE
I cheated on trimming my curtains – you can read about it here.

In this “after” you can see that the mirror has a new frame (psst… it’s a $5 thrift store find that is just leaning against the mirror while we decide how to make one that is a perfect fit.) It gives the mirror a ton more presence!

AFTER
You may have noticed that I also messed with the gallery wall. It was a little too random for me before. It felt more kitschy than I liked, so I regularized its shape. I can’t swear that I’m done tweaking that…
I’m very fond of my bright pillows & throw on the loveseat. I like to think they detract from the BLACKNESS of the black leather furniture – please smile and tell me I am totally right :) Darlene at Fieldstone Hill Design posted about ugly duckling furniture a couple weeks back and this is mine. When I nurse Miss E I sit in the armchair opposite and stare at my gallery wall and bright pillows instead of the loveseat, and it feels good inside.

Finally, here is the old view of the back wall…

BEFORE
…and the new and improved view.

AFTER
I have a bonus for you too. Guess what, I actually painted the inside of the front door! It’s been this bluish gray primed steel for three years and I finally finally finally painted it white. It took a day’s worth of naps and four coats but it was so overdue.
Before…

BEFORE
And now…

AFTER
So there you have it! This was not a dramatic makeover but a series of important tweaks that make the living room look more intentional and cohesive. And that’s what a good re-design should do. I’d still love to paint the walls a deeper tobacco tan shade but first I have to convince the Chief ;) Other than that, the living room is pretty much done. At least for now!
(For Part 1 go here.)
Sometimes I feel sorry for people who have big houses. You know, the houses with a designated room for every activity: the workout room, the office, the guest bedroom… the foyer. That’s right, some people have a WHOLE ROOM just for coming inside the house.
You see, the people in these spacious houses with bonus rooms never have to tackle the character-building creative challenges of small house design. Take, for example, when your front door opens directly into the living room. When you walk in straight onto the sofa, you need to do some creative furniture placement to give your homecoming a little more cushion.
So let’s recap – here’s what I started with. That segment of wall behind the front door was acting as a semi functional entryway with some hooks and a place for my purse, but I knew I could do a lot better.
My idea was to get a large dresser for that spot and paint it green. This would anchor the wall and make everything look a lot less cluttered, while giving me plenty of new storage space.

A few weeks back I shared my dresser find and transformation, leaving you with this lovely lovely image.

I’ve been working on the rest of the details and I’ve finally got it completed!
Now when I show you the afters, be aware that I had to leave a big blank space on the surface of the dresser. Besides carving out a defined entry, I had an additional challenge – I have no nursery for Miss E and I needed a changing station other than the floor. Remember this?
Well, enough of that! A small gateleg table I already owned folded up small enough to tuck in at one end of the dresser to keep the diapering stash handy. I do cloth diapers, so I have a basket full of prefolds and Thirsties Duo wraps, plus a container of cloth wipes. (For those who are interested, I tried pocket diapers and haaaaated stuffing them and laundering them. I love my old fashioned prefolds so much more.) My changing pad folds up between the diaper basket and the dresser when not in use.

Under the table is a wet bag for used diapers. The upper right hand dresser drawers hold supplies for the occasional disposable diaper. It’s as inconspicuous as I could hope for a changing station in the living room.

On top of the dresser and on the wall above it, I basically rearranged the art and brought in some new items from around the house. The tray is one I already had and I spray painted it hammered bronze, then did the edges silver with rub n’ buff.

The art is a couple favorite pieces I though we’d want to see every day. There’s the collage presented to The Chief as a gift – Amy Adams is saying “My car won’t start. It’s broken. Who will fix it? Who will fix it??” He fixes cars as a ministry to friends in need :) The colorful coastal watercolor is my very favorite piece of art, found on Etsy a while back. I wish the glare on the glass weren’t so visible! Don’t know how to avoid that at this point in my photography skills.

Clearly my tray is not styled – that’s what you see in real life, friends. I do love a beautifully styled tray but I just don’t have space for a tray full of pretty things you can’t use, only look at. This one corrals my clutter and gives it some boundaries!
Up on the wall shelf we have a photo of the vintage Ferrari dashboard that the Chief was hired to restore (the dash, not the whole Ferrari). The Ferrari won second best in show at the major international show it was subsequently entered in!
I made the little blue pottery vase, and also the aqua print sunhat for Miss E.

Ready for the full reveal?
Before

During

After

I think the straw hat hanging on the wall really helps to balance the necessary blank spot on top of the dresser where the changing pad goes.

Here you can get a good idea of the entryway as a whole. The back of the armchair creates a nice “‘hallway” with the dresser for coming into the house without walking between people having a conversation. Painting that front door white is on my list for this week! I’ve had enough of the bluish primed steel door look.
So there you have it – one more area of the living room is tweaked to perfection. I didn’t spend any money on this part of things, so the running total for the living room is still $118.
Do you live in a house with the entry straight into the living room? How have you handled that?
As you might remember, I’ve been on the lookout for dining room chairs so that we can sit at the farmhouse table I refinished. Surprise! They’re here!
When I was searching, I was a little worried that the kind of chairs I wanted, at the price I was willing to pay, would not show up in any reasonable timeframe. I wanted:
- traditional, attractive styling – not all straight lines
- dark stained wood, though a dark painted finish might be ok
- under $150 for four chairs
As I searched Craigslist and visited a few thrift stores over the next month, I realized my criteria were very hard to come by all in one place. I found ugly cheap chairs. I found expensive pretty chairs. I found tables with chairs not sold separately. I found light stained chairs for the right price but the wrong color.
And then one Friday at 5pm I found a brand new Craigslist ad from a local antiques warehouse saying that they had a bunch of junky antiques in temporary storage which they needed to clear out by the end of the weekend. I was knocking on their door when they opened on Saturday morning.
Long story short, I haggled the beardy fellow down to $75 for four semi-antique white oak chairs that had ALREADY BEEN re-glued, stripped, and totally sanded by a professional antiques restorer. And they were awesome.
![IMG_0285[1]](https://figtreesundays.files.wordpress.com/2013/02/img_02851.jpg)
They’re super sturdy, but look at the fetchingly slim ankles on these girls.

Front and back views:


I decided to stain them a nice dark brown, just shy of black-brown. I felt that since my table is mid-to-light orangey brown, contrasting darker chairs would be grounding in my white dining room. Also, that was my favorite combination when I was pinning inspiration photos.
The stain I used was Minwax Dark Walnut. I love how the grain showed up after staining! There are lots of variations and tiger stripes in the wood that catch the light. Because Minwax oil stains have a bit of sealer built into the product and the chairs are not going to get the same kind of abuse as a tabletop, I chose not to apply any kind of additional top coat but simply rubbed them down with Howard’s Feed N’ Wax. (I’m fine with them collecting some handling marks from time and use.) The chairs had been so nicely sanded by Mr. Antiques Restorer that they felt silky and finished even before the Feed N’ Wax, which is not always the case with freshly stained wood.
As for the seats, they were originally caned but I took them in a different direction. I made a cardboard template for the seat bottom (shown) and then cut the base out of 3/8″ plywood.

The bases are secured to the chairs with bolts through special threaded metal tubes the Chief installed. This way the seats can be removed and replaced whenever necessary without wearing out the fastening mechanism.

On top of the wood base is glued 1″ high density upholstery foam, wrapped in high-loft batting. I traced the template shape with a sharpie and cut out four foam seat pads with my bread knife, then cut the batting in roughly the same shape, about 4″ wider all around.
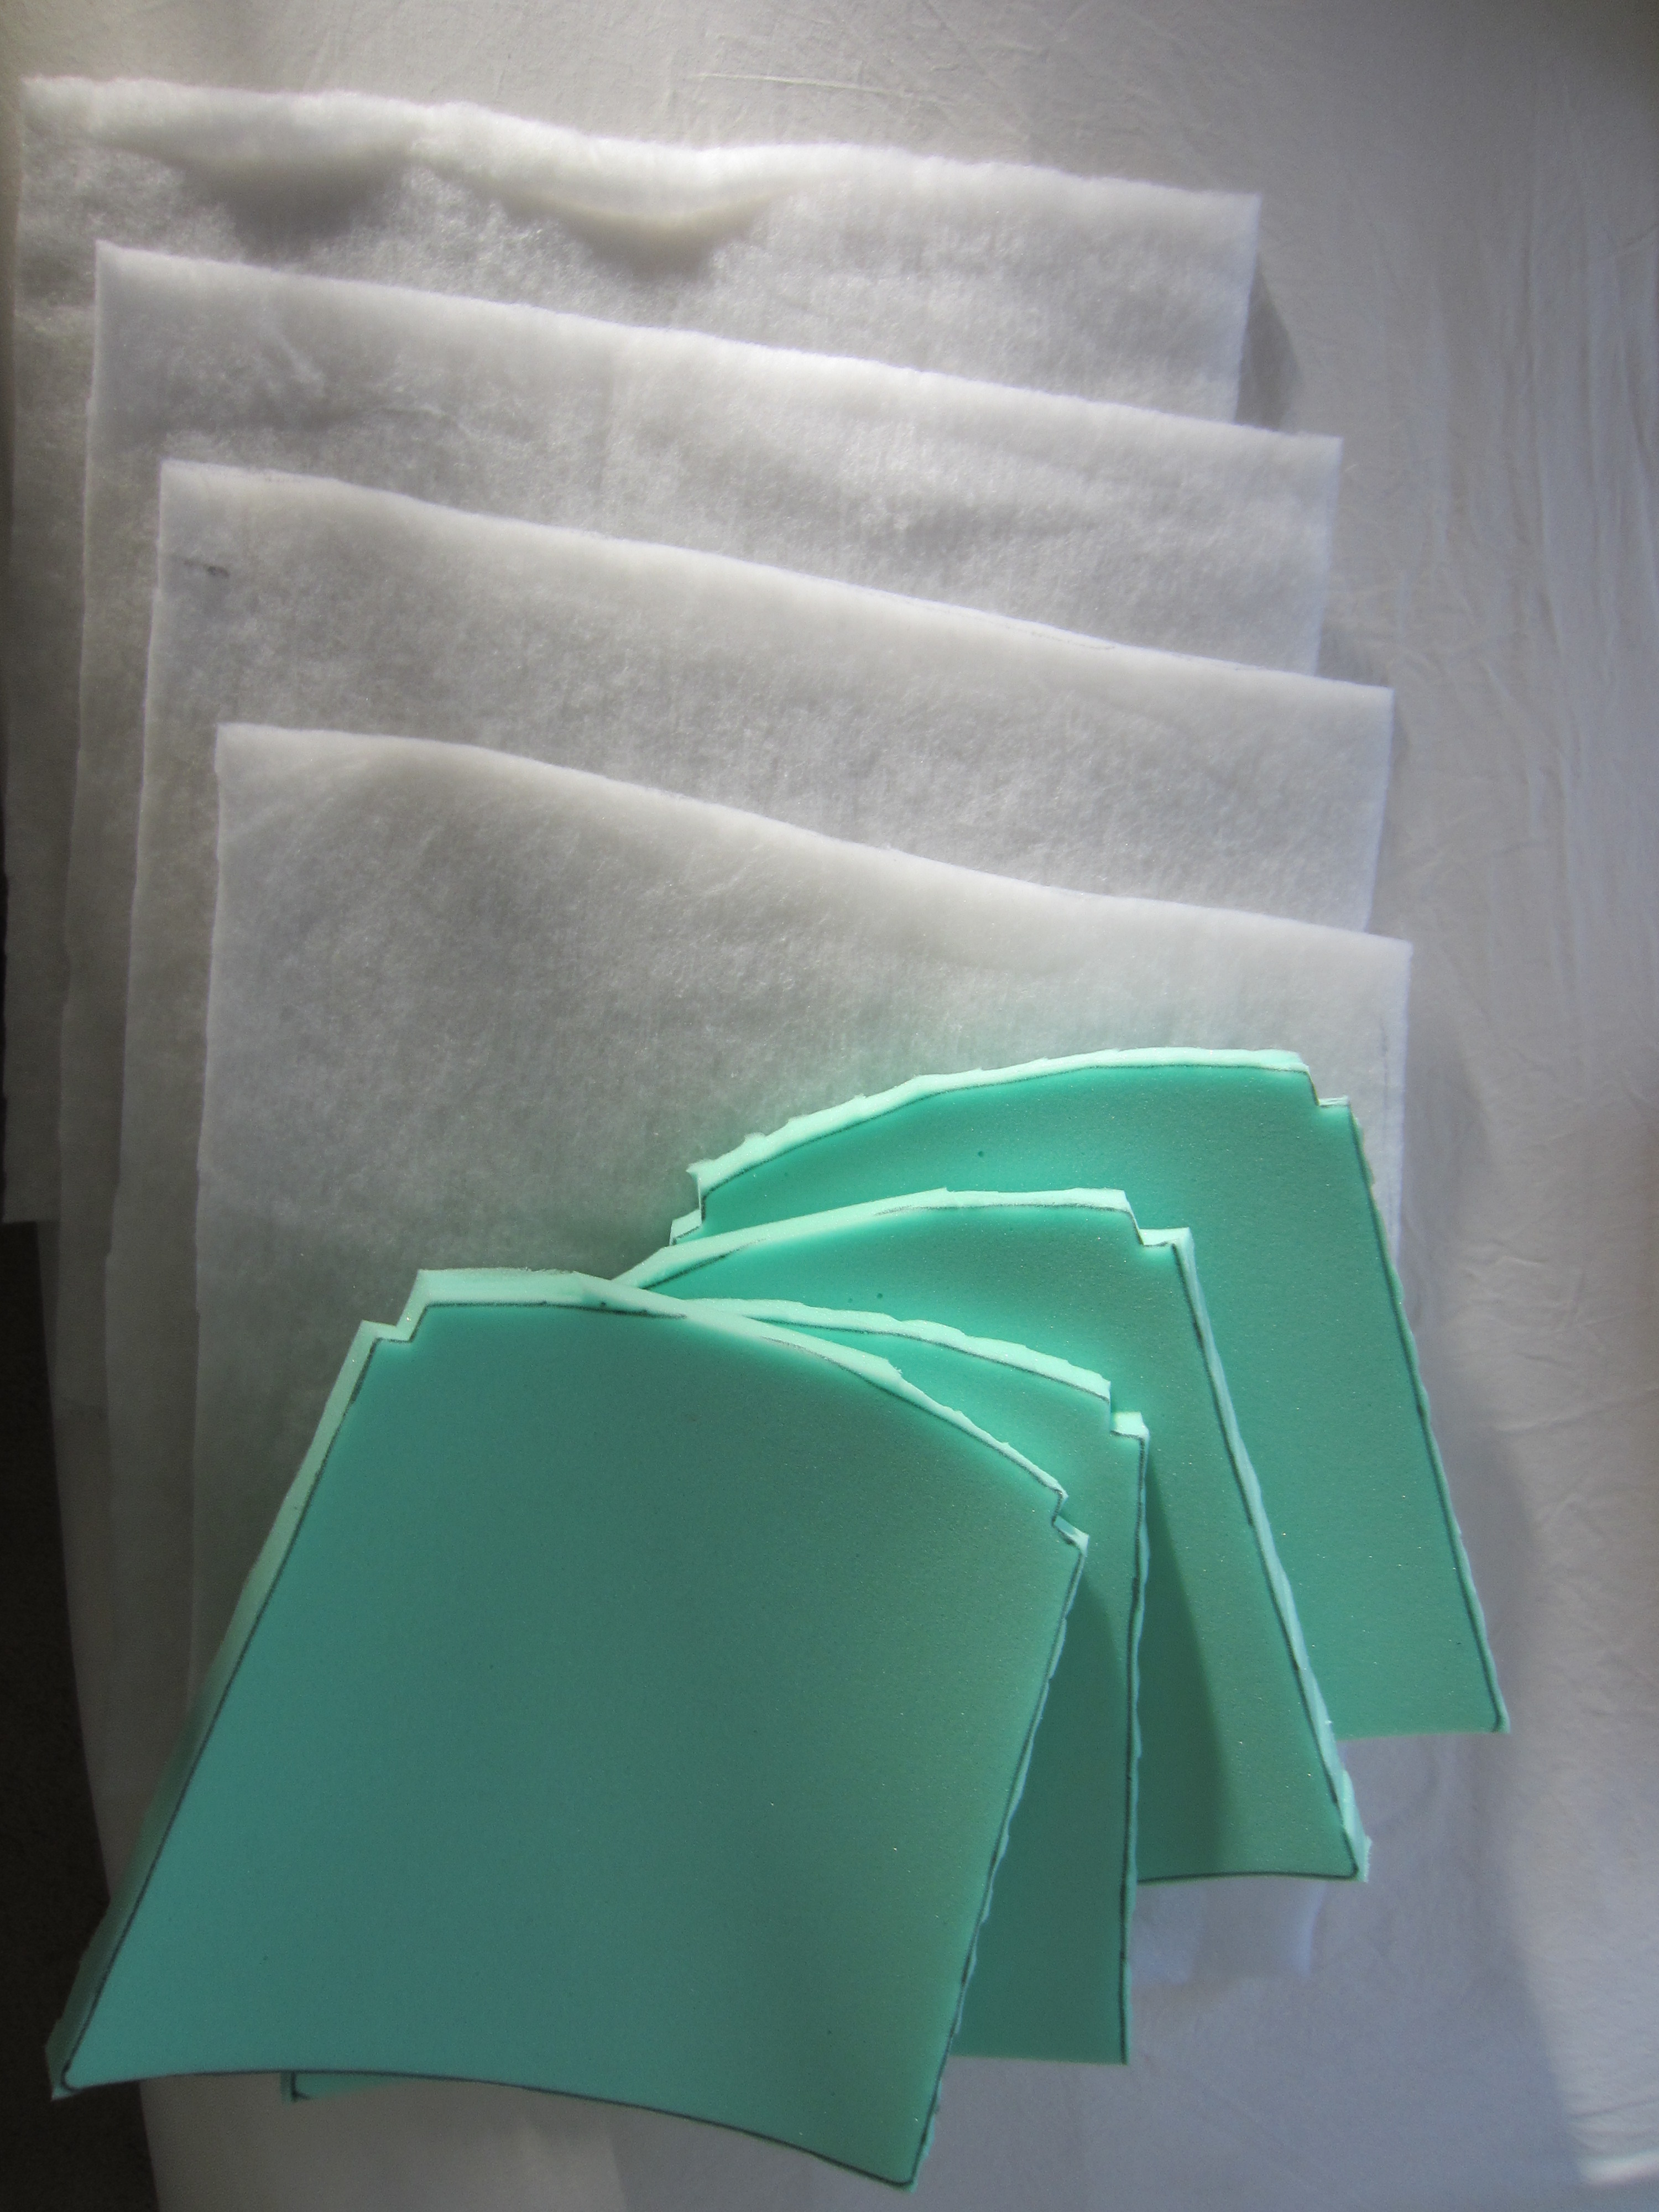
This was all glued and stapled in place over the 3/8″ plywood seats, then they were covered with Joann Fabric’s best-quality vinyl “leather”. I wanted a wipeable surface that could take children sitting on spaghetti and adults spilling wine!

I bought ALL these upholstery supplies with 40-50% coupons or sales because these are expensive items! Never buy anything over $5 at Joann’s without a coupon or a sale, say I.
Before I show you what we have, here’s one of my top inspiration photos. I love the look, though I can’t go that girly in our house. I also hope to make something like that swagged thing out of a drop cloth. I think it will add a lot of warmth to the blank wall we have without being as predictable as art or a mirror.

Source: mydesignchic.com via Julie on Pinterest
And now…. TA DA!! The most beauteous dining room our household has known. The eventual plan is to build a bench or banquette against the wall so that we can seat up to 7 at our table. What you see there in the pictures is actually the headboard of the full sized bed we used to sleep in. I doubt we will actually convert it to a dining bench but it makes a great placeholder while we have other parts of the house in disarray.


For now… I’m grateful that sit down dinners have become a reality again! No sooner did we start eating in chairs at the table than we started saying grace again and having conversations over the food, something that somehow fell by the wayside in the interim.
Have you ever had four months of dinners on the sofa while getting a dining area together? Or done any transformative chair reupholstering? Do share!
You know those old couples who sit out on their front lawn side by side in folding chairs and watch the neighborhood goings-on? Yeah, that was us. Except we were watching other people work on our house. Our driveway, to be precise.
Up till now we’ve had a pitted, disintegrating asphalt driveway that we’ve just lived with. The Chief works on cars out there and it’s not pleasant to lie on your back for hours on a surface that looks like this:

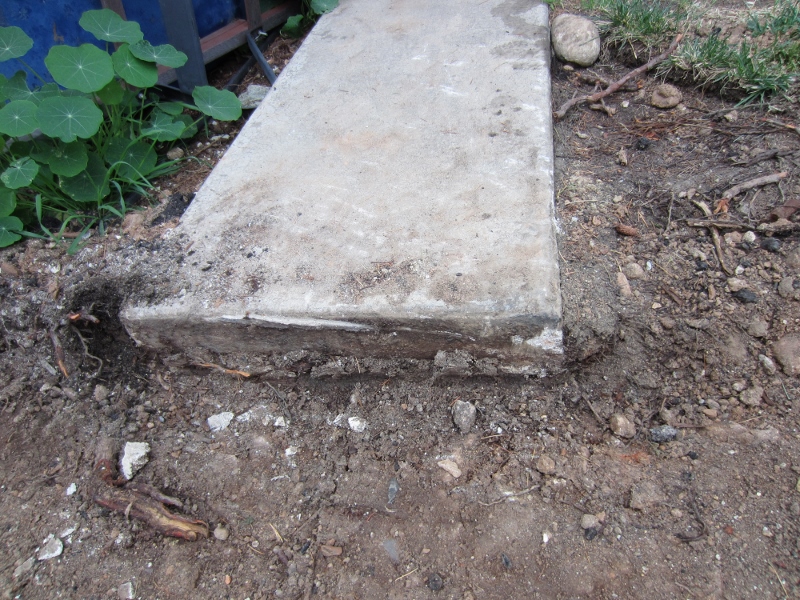
It finally made sense to replace the driveway, and I think it might be one of the most joy inducing house projects for the Chief. Not only was Someone Else doing the work on his property, it was going to make his life a million times more comfortable. It would let him work under cars comfortably as well as simply and easily roll out a tool cart, an engine lift, a jack, without the hassle and danger the old asphalt presented. To keep costs down, he did all the prep work of removing the old paving and creating the foundation and forms for the concrete. This included spraying the dirt down to make it easier for the mini-earthmover to remove it.

You can see how far down he had to dig – about 6″. We did not use rebar in this pour because metal is a lot more expensive than cement right now, and it is cheaper to do a 6″ slab of concrete (very thick and sturdy) than to do 3″ of concrete with rebar.
With the driveway all dug out and prepared, it looked about like this. The forms have not yet been installed here but it gives you the wide angle picture.

About 6:30AM on Saturday, a half hour before they were scheduled, the crew and first concrete truck arrived. The Chief sprang out of bed and went to go over the morning’s plan. They taped up plastic on our house and the neighbor’s to ward off splatters, then backed the concrete truck to the far end of the driveway. Here’s the very first cubic foot being poured!

By 7:15 we were out back in our folding chairs, sipping tea and coffee respectively, and having a wonderful time watching the guys make our driveway look 1000 times better.

After a while we relocated to the front yard to watch that part of the pour. Here the crew is leveling out the driveway.
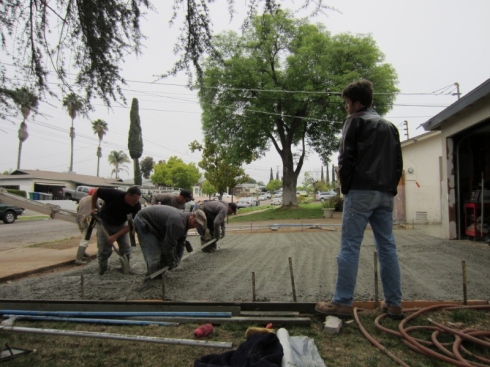
After leveling, they float it with two different types of floats (flat paddles on long poles) that push the gravel down and make the surface of the concrete smooth.

Once the concrete has been floated, expansion lines are marked to create some give in hot and cold conditions.

The weather was blessedly perfect for pouring concrete – not too hot, not too cold, cloudy and damp but no rain fell. This gave them plenty of time to work the concrete into a perfect finish before it started to harden. From start to finish the whole job took about four hours. It took EXACTLY two cement mixers’ worth of concrete. We were nervous we’d be a measly couple of yard short and have to tap into the third truck we had on call, but with a little bit of smoothing the crew was able to fill the last spot and still have one or two shovelfuls of concrete to spare Here is the final product.

That’s a massively improved driveway, don’t you think?
I’m remembering how just over a year ago we replaced the warped wooden garage door and beam with a new steel I-beam and a beautiful automatic garage door. With this new driveway poured, I think we’re about done with this part of of the house. Our neighbors have been giving us thumbs up as they drive by, so everyone is a fan and we’re the rock stars of the week on our street. That feels pretty good! Next up: maybe we’ll finally take that 5 gallons of exterior paint and and repaint the house at last. Till then, I never thought I’d be so pleased with a broad expanse of concrete paving. How do you like our new surface?
