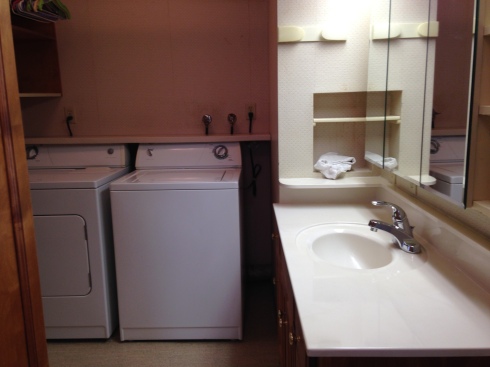
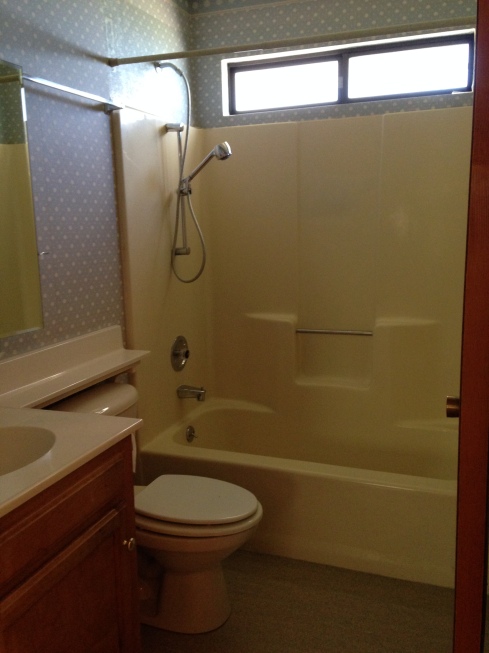
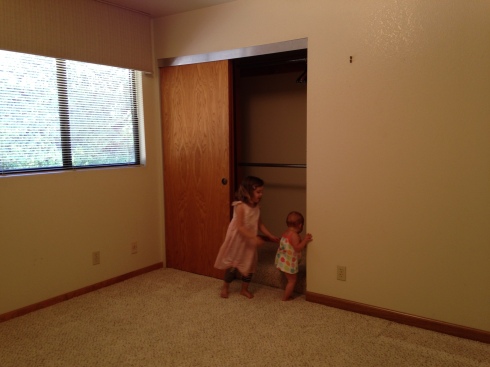
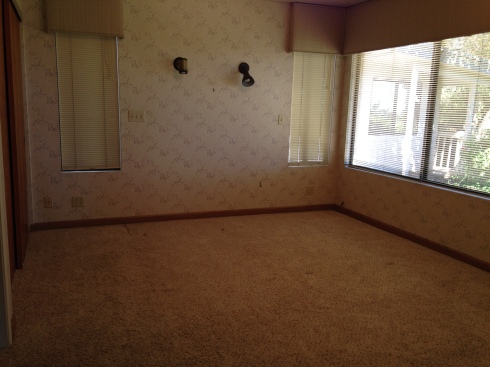
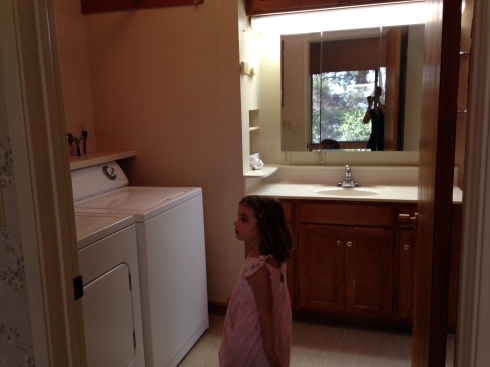
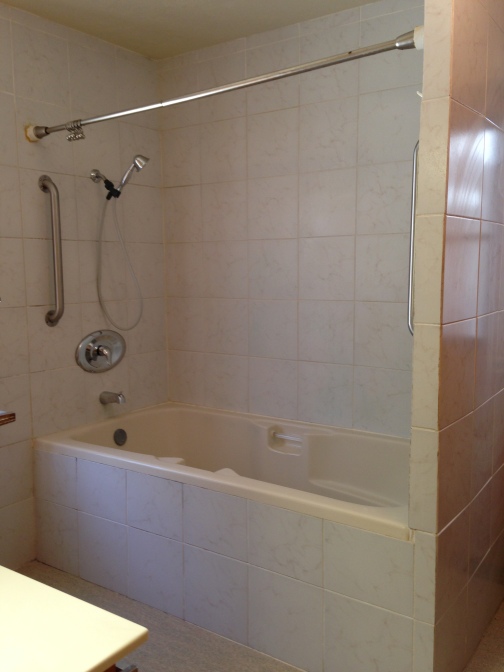
We are officially starting work on the main house this weekend, after 6 grueling weeks of getting the rental apartment ready for occupancy.  It was fun helping make decisions on the apartment but now that it’s our own house we’re looking at, I’m truly beginning to feel excited!  I want to share some of my inspirations and plans for the house as we begin the Renovation, Pt. 2.  We are only updating the main living/dining/kitchen, entry, and hallway before move in — the dated bathrooms and bedrooms will be done on a slower pace later on.

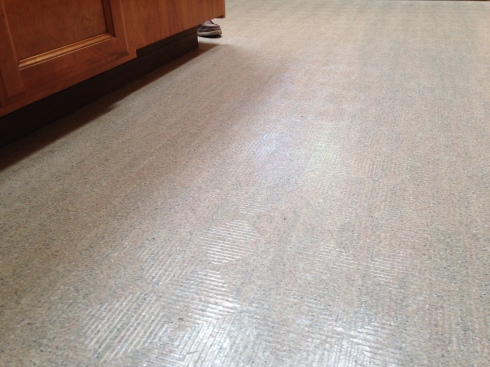
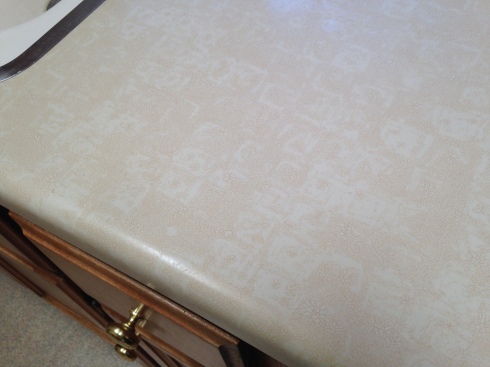
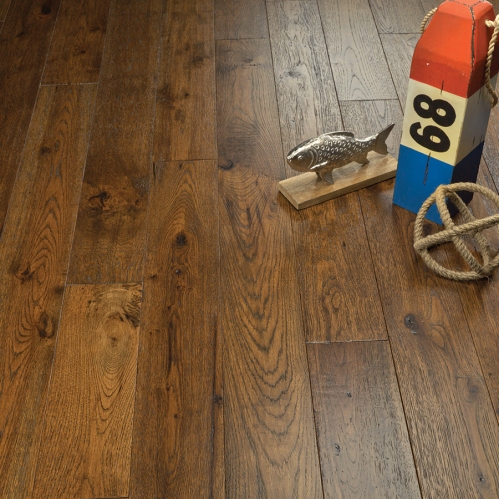
One thing I’ve learned as I’ve studied decorating is that if your house has good bones, then half the work is already done.  A room with good proportions, attention to fixed finishes/architectural detail, good window and door placement, is easier and cheaper to decorate.  You don’t generally need to spend a lot of energy and money figuring out how to decorate around or distract from weird features. To that end we are putting in engineered hardwood flooring that feels and looks like old planks.  I love it.  It’s called Novella Thoreau Hickory.

Thoroeau_Vignette1

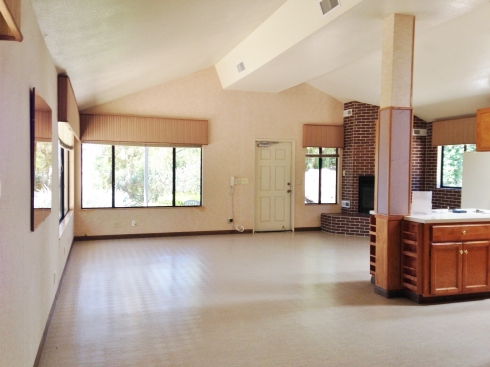
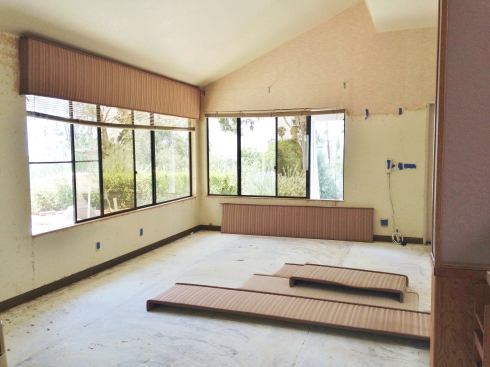
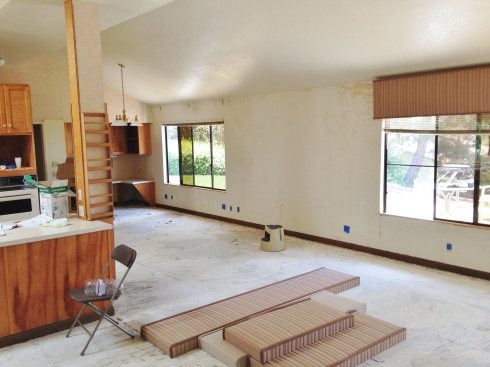
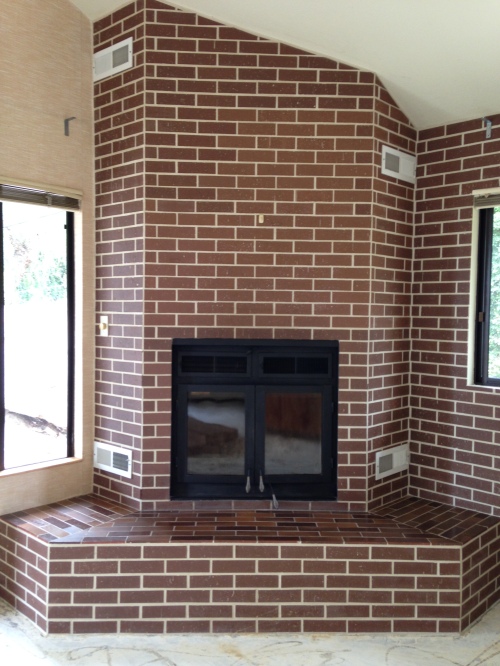
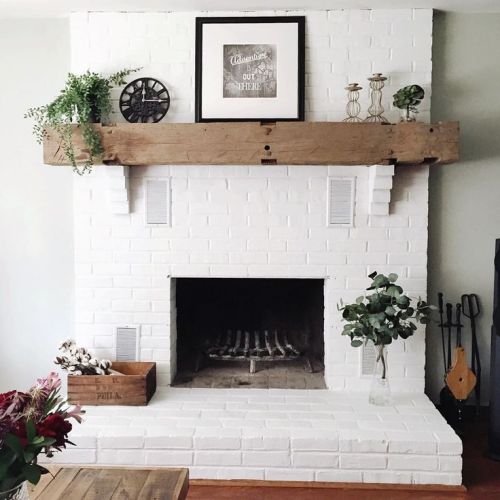
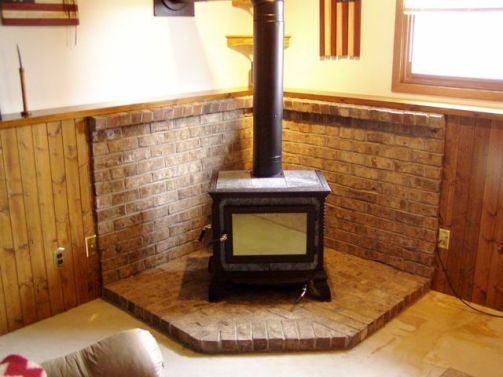
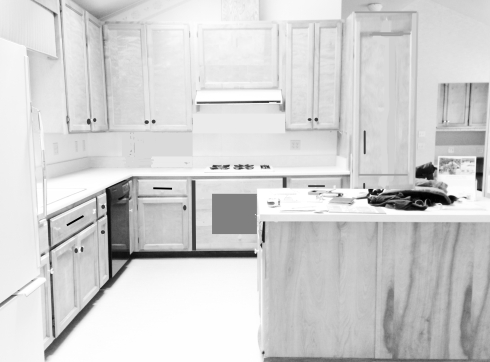
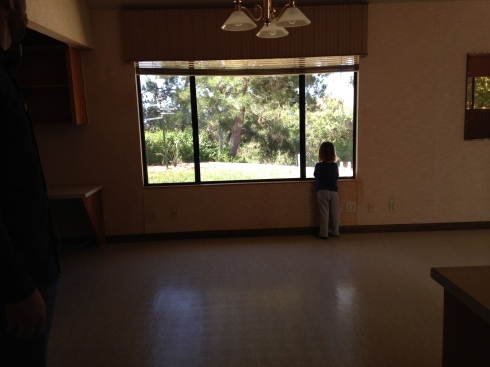
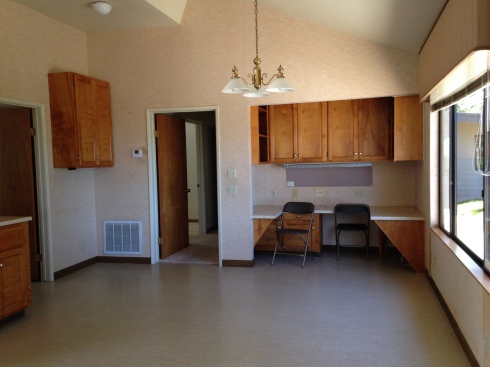
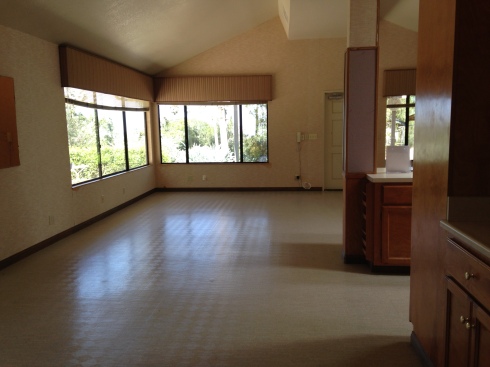
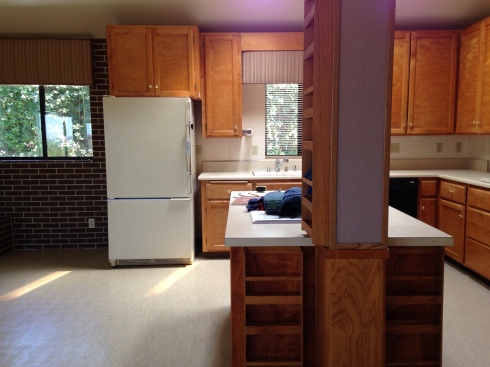
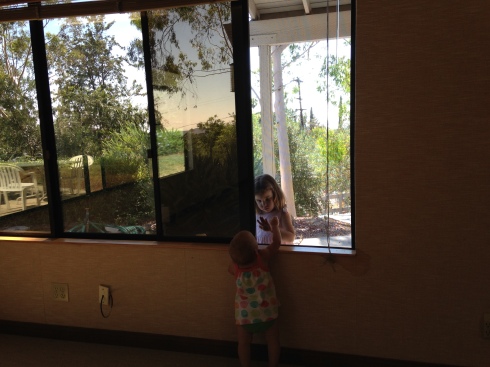
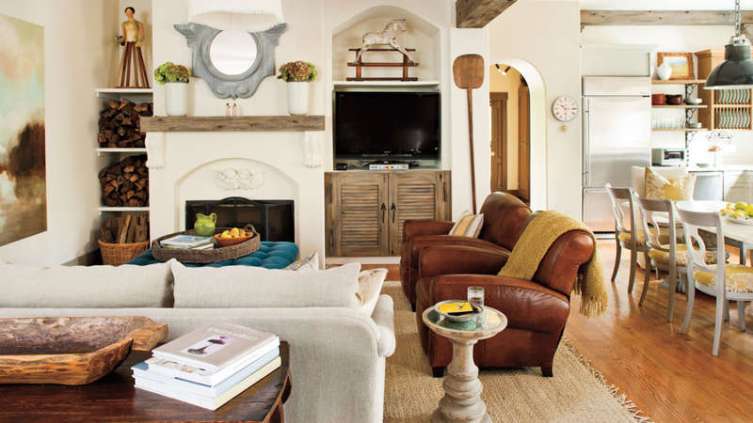
On the same note of creating a good base to decorate on,  we’ll be adding some built ins.  This house lacks architectural interest in the main living area.  It is designed with an open floor plan but it’s so small that the kitchen island floats in the middle of the living/dining/kitchen space and every furniture arrangement would feel like we are sort of in the kitchen.   Plus with all the picture windows there was no place for a TV!  So we are building a partial wall around the kitchen for better zone definition.   This allows me to have a wall opposite the corner fireplace with two built in bookshelves, very much like these.

james ransom shelf

Katherine-Power-Style-7

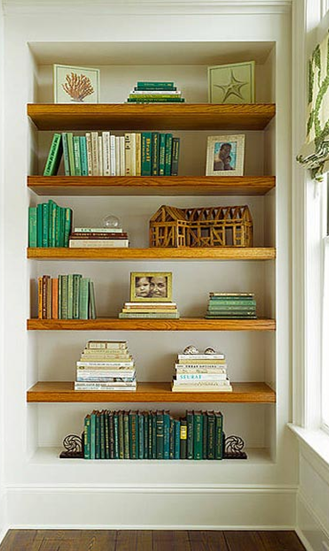
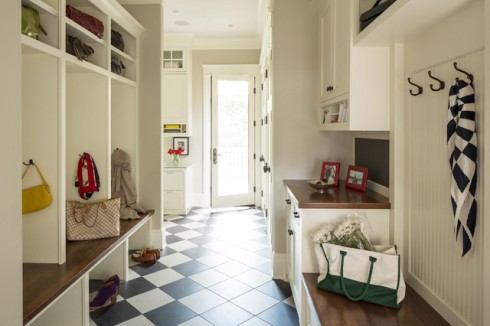
I love the lack of trim on these built ins – it suits the simple and clean style of the house and Southern California architecture in general.  The wooden plank shelving adds warmth.

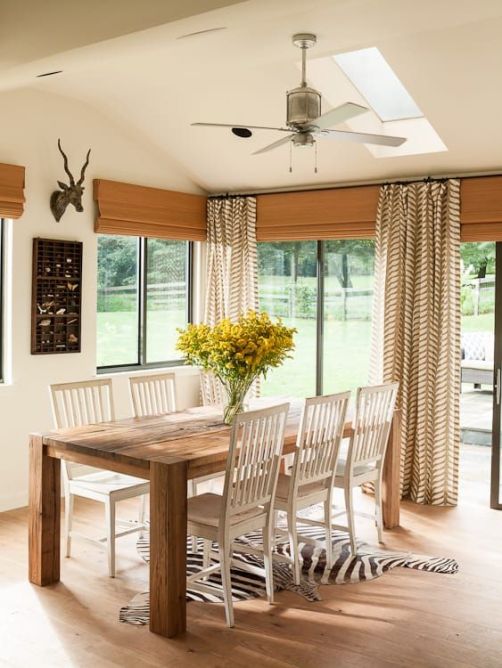
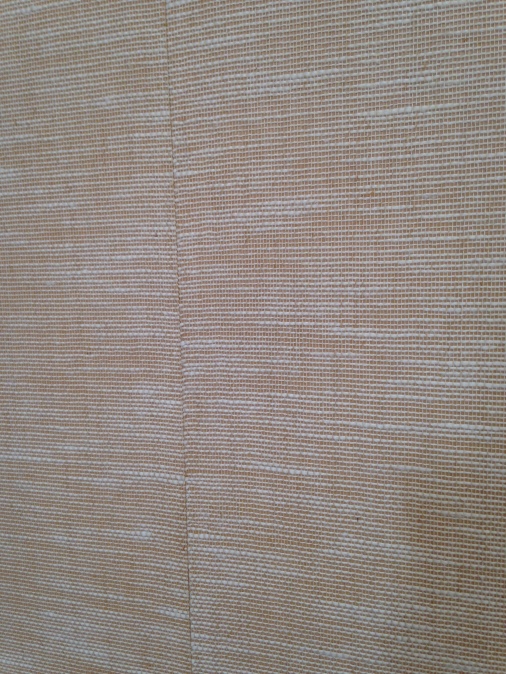
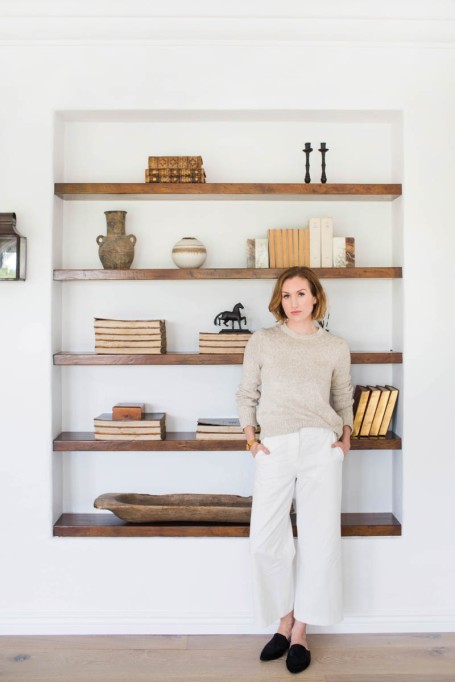
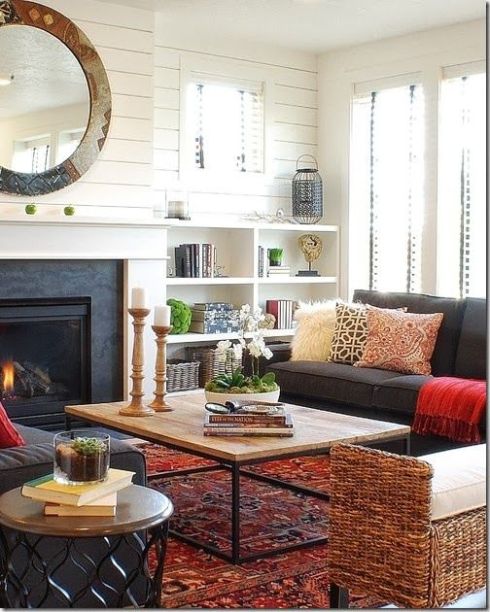
My favorite pinned living rooms are split between more colorful and modern, and more neutral and paler.  They all have in common a big dose of natural texture, white paint, and lots of light.  We’re keeping everything we already have in the way of furnishings but there will be a little room for adding in things to tweak the feel.   Here are a couple of my very favorite inspiration living rooms.

lr1

lr2


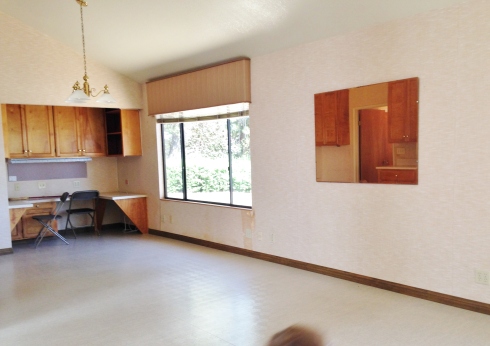
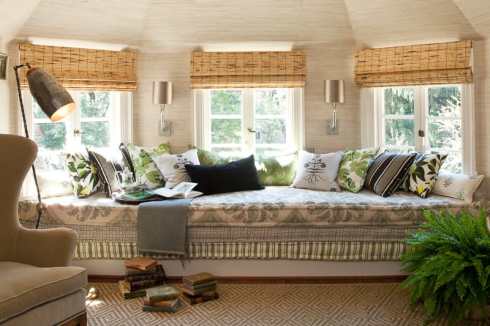
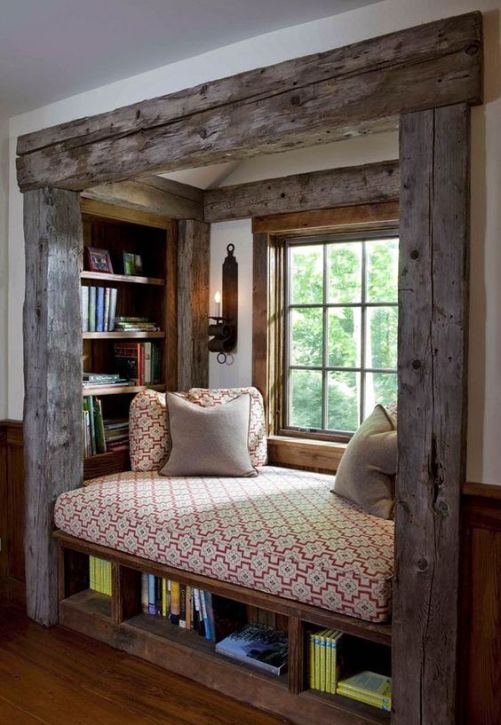
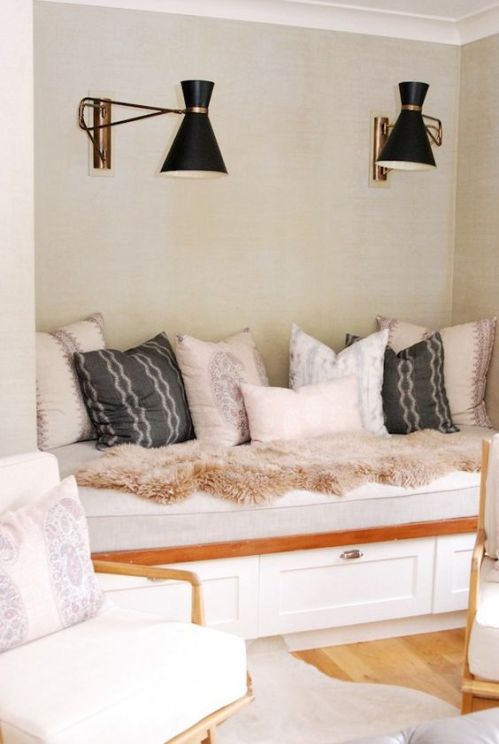
Last but not least as far as the living areas go, there will be an insanely inviting and cozy reading nook, eek!  I’m hugely excited about that because I am a reader and this feels like the chance to make a magical spot for me and my girls.  It will have a long wide seat with bookshelves at one end and possibly some storage underneath.  (No window at the back, just a wall.)

nook1

nook2

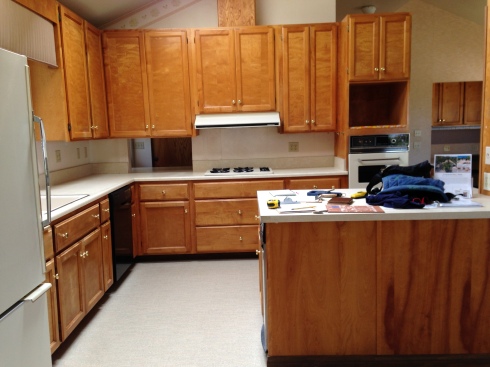
So that’s the plan for the living areas!  I’ll share some plans and inspiration for the kitchen and dining areas next time.  I hope you enjoyed a glimpse of the future!


While my husband works hard on renovating the granny flat, I’ve begun working a bit on the main house. Since I have a 1 and 4 year old with me all the time, it happens inefficiently and infrequently, but thanks to naptimes in the Pack N Play for 1 and Netflix on the ipad for 4, I have been able to make progress!

Prior to move-in we are renovating the main living/dining space, the kitchen, the entry, and the hall.  Only the hall is not wallpapered.  Every time I find a little bit of space that’s not papered elsewhere, like behind the spare fridge in the entry, or inside the coat closet, I spontaneously give a joyful prayer of thanks! Wallpaper is hard, people.

IMG_2442

The main living space has this thick stringcloth stuff on it (similar looking to grasscloth), and I finally figured out the trick to get it off well was to saturate it with water till it gets soggy.  It is literally constructed of natural fiber string or twine laid over thick paper backed with glue, and you wouldn’t believe how much water it all absorbs.  It also smells like wet rope.  I started the first couple days wetting it down with a spray bottle like YouTube told me to, but I was inflaming my weak wrists tendons with all the trigger squeezing and the paper still didn’t seem quite wet enough to release well.  So I bought a 1 gallon pump sprayer from Lowes and it was the best $10 spent on the house so far!  So much easier.  I saturate the paper 3 times, waiting several minutes between each coat as it soaks in, and then it comes off with a putty knife helping along behind it- very little scraping pressure required if I just apply enough water.

Even the easier pieces of wallpapers leave some backing and glue residue behind on the wall, and the places where I first worked (before I found the best technique) left quite a bit.  So I have areas that look like this, and the whole room will need the walls completely cleaned and washed before they are paint ready.  That’s going to be a whole new ball of wax to figure out, I’m sure.

IMG_2621

Textured walls aren’t  helping me here…

As of this week I have all the stringcloth removed except what’s above the 8 foot mark, which I’ll need a ladder to do, and inside the office nook.  All those office cabinets are coming out and since the paper runs behind a lot of them I’m just going to wait till they’re gone.

The walls I’m uncovering are painted a dirty cream color, something like Antique White or Navajo White, and the tone of light inside is so much nicer with the peach wallpaper mostly gone.  Once the orange cabinets are removed and/or painted white, the orange glow will be completely gone!  I don’t think the amber tint on the windows will be so awful after that.

BEFORE

IMG_2352


PROGRESS

IMG_2642


BEFORE (Yes that mirror which came with the house actually has an orange tint on it)IMG_2440


PROGRESSIMG_2645

You will notice the flooring is also out (Thanks to a friend on that one!) We’ll have to get the adhesive off the concrete before we can lay hardwood but it can be done.

FLOOR BEFORE AND NOW

Goodbye, flooring.  You were indestructible but plastic and ugly so you had to go.

IMG_2646


Also you’ll have noticed some of the valances above the windows are down.  I was able to remove several of those but a couple were screwed in really tightly so they’ll have to wait for someone with stronger arms and power tools to come along.

BEFORE and AFTER on the fireplace window valance


This revealed a couple more precious inches of light and removing them definitely took away some of the dated feel, but the window are still kind of low and squatty.  That’s ok, I have a plan.  My all time favorite interior designer, Lauren Liess, lived for several years in a 70’s home with similar architecture or lack thereof, and I am basically copying a lot of her ideas for our house!  Look, same windows.  She does outside mounted bamboo shades to disguise the blank space above the window.   That’s basically what the valances were doing but this is a fresher look.

ll

Lauren Liess design

11005LL_042_web


Next I have to take down the wallpaper in the kitchen and entry.  It’s a more typical “papery” wallpaper, not thick and burly like the stringcloth.  The first little section I did in the kitchen came off without too much trouble, but the second piece started to turn into tiny shreds instead of peeling off nicely.  I may try to borrow a steamer from someone and see if that helps!

Have you ever dealt with de-papering a room?  Do you have two hours to spare to come help out? ;-)  Or a steamer I could borrow?? Send your best wishes and tips my way!

As we leap into work mode there are a few things I want to share about our fixer upper that I’m quite grateful for.  With any new house there are always things you love and things you’re not so fond of, and when it’s not move in ready, the stuff that needs changing can start to feel like a giant pile of annoyances as you reverse the choices the previous homeowners made.  Here are some of the best things about the new place.

I’m so very glad our fireplace is like this.  A corner fireplace is a little harder to arrange furniture around, but all it needs is white paint and maybe a mantel nailed up to be attractive.

IMG_2622

In the near future it should be looking more like this:

fireplace


You know why I’m super grateful for this particular fireplace?  Because almost all the other houses we looked at also had a “fireplace”… this kind.

OLYMPUS DIGITAL CAMERA


We don’t have the budget to change that kind of thing to a real fireplace – I would have been stuck with it.  Urrkk!

Next, I’m grateful for an indoor laundry area.  Ok, it’s in the master bathroom, but I’ve been doing laundry in a garage full of greasy car repair projects for the last 7 years.  It will be really nice to know my clean laundry can fall on the floor and not maybe have to get washed again!

IMG_2489

Perhaps down the road I’ll put up some bifold doors like this cute space so we don’t have to see the washer and dryer all the time.
small-laundry-closet-ideas-laundry-room-in-closet


This one is pretty basic, but I’m thankful for two bedrooms and two baths!  Our current house only has one of each and is about 1000 sq ft with additional unfinished space that we store stuff in rather than live in, and this new home is 1400 sq ft.

(No picture for that one — I’ll finish up the floorplan and post it at some point down the road.)

I’m also thankful that the kitchen has a very work friendly layout.  It’s small at 11×11 and I prefer small kitchens – less wasted movement.  I’ll tell all the details of our planned updates in a future post so for now let it be said the work triangle is just what I like and I’ll be so happy with the space after a coat of white paint and a minimal amount of remodeling.  Here’s the world’s worst mockup just so you can see that it’s not so bad looking when it’s not bright orange wood!

IMG_2339 - Copy


Moving on, I’m delighted that our new place has an actual entryway!  It is great to have a large and practical transition space into the house instead of being dumped into the living room when you open the door.  Having a sense of entrance is a really good feeling, not to mention having a proper spot to put down your bags, keys, coats, etc.  It seems like a lot of homes don’t have that.

IMG_2629

The fridge is going and we’ll be painting the cabinets and laying new flooring before we move in so that’ll take the entry a good ways toward finished.  This photo below has sort of the feel I’m imagining, though we’ll have wood plank floors.

transitional-entry


Last but not least, this place has privacy.  There are blinds on all the windows but if I don’t run around at dusk to close them we’re not going to turn into a fishbowl to every passerby!  Between the 2 acres of property, hillside location, and the 8 foot hedges, it is our own little oasis.  We do actually have a granny flat rental over the detached garage, but it’s all arranged in such a way that those neighbors can’t see into or walk past our house.

IMG_2627

While we scrape and paint and sweat, I’m going to keep these blessings and the bigger picture in mind to get through the valley of the shadow of construction!

What were your favorite things about your fixer upper?  Have you lived through a DIY remodel with small children and lived to tell the tale?

Hello dear readers!  I’m resurrecting my dormant blog because, dun dun dun, we are moving.  To a fixer upper, of course.  The new property is out of the city, on 2 acres with a view and two enormous garage/workshops for the Chief, a major selling point.  The house is slightly larger than our current place, with enough space for our family of four.  It is also in pristine exceedingly dated condition.  It was built in 1984 but feels like a mix of the 60’s through 80’s.

We’re working on a tight timeline and budget so I’ll be sharing just the broad strokes as we prepare it for move-in!  We’ll be updating the main living areas and hold off on the bedrooms and bathrooms for now.  There is so much bad wallpaper and vinyl flooring to rip out everywhere, I can’t wait.  Without further ado, the “before” pictures!

Because of parking, the side door is the main door.  It actually does go into an entryway, unlike the main door which opens straight into the living room.  This little porch light with bizzarely placed installation is par for the course for the interior as well.

IMG_2497


The entry, below. There are cabinets along the right and two closets (coat and broom) on the left.  And an extra fridge…  and you can’t see it here but there’s a counter level pass through on the right, perhaps to shove your grocery bags through to the kitchen?

IMG_2456


Moving forward is this large window, which we’re replacing with French doors for better access to the backyard.  You currently have to go around the house to get to it.  Hard to see, but to the left of the window is an office nook.

IMG_2345


Here’s the office nook!  I want to rip it out and put in a reading nook instead.  The open doorway leads to the hall and the beds/baths.  You can see the previous owners were really into lots of storage.  Luckily this means I can rip half of it out and still have plenty.  Gotta love that upper cabinet hanging out all by itself!

IMG_2349


So looking in the other direction is the open floor plan living/dining/kitchen area.  Two huge (12′ and 8′) windows are there for the view.  The column in the middle is structural, holding up the roof, and the kitchen island is right against it.  You can also see the not so attractive ducting space running along the peak of the vaulted ceiling.

IMG_2350


The kitchen is basically hanging out there in the middle, and it really doesn’t work for me.  There’s not enough width around it to use furniture to divide the space better, so we’re putting up some partition walls around the kitchen to make it less open.  I’ll detail the plans for the kitchen in another post, but basically the fridge is moving to where the island is, the fridge corner is getting walls around it, and everything will be painted off-white.

IMG_2338IMG_2339


So much orange and gold!  On the floor of the main area is a lovely pink and gray patterned vinyl.

IMG_2444


The kitchen counters are dated linoleum but the pattern is not noticeable from just a few feet away and reads as a decent buttery creamy color.  Good, cause they’re staying. IMG_2445


The walls are all covered in grasscloth wallpaper, which is experiencing a trendy revival right now. Sadly, the peach color and waterstained spots on it make it only worthy of the dumpster.  Did I mention all the wallpaper we have to get off?  Not looking forward to that.

IMG_2442


We have a problem with the windows, which I didn’t realize until we were in escrow (and it wasn’t a deal breaker).  All the south facing windows have a heavy amber tint on them.  You can really see it where the window is slid over and the glass is doubled up.  It makes me feel like I’m inside a cigarette – everything is all dingy and yellowed.  I thought initially it was just the paint and finishes, but it’s also the windows!  I desperately hope I can get the tint off myself with the help of Google, because I want to enjoy that California sunshine.

IMG_2450


Next is the main bathroom, in the hallway.  I won’t be tackling this until after we’ve moved in but I think that with everything painted and a decent mirror, lights, tile, and towels it will be quite passable without much of a budget.

IMG_2467IMG_2460


The girls’ bedroom –  not much to say here except thank goodness there’s no wallpaper! They will probably be living with it as is for quite a while.

IMG_2477


The master bedroom.  Wallpaper.  Mismatched sconces.  A wall of windows!  Two closets.  And…

IMG_2481

it even has its very own laundry room – slash – master bathroom.  Yup.  I don’t even know how we would change all this – it would be extremely expensive to rearrange the location of things due to all the plumbing.  The toilet is around behind the sink wall.  I’ll worry about it in 3-5 years!  Meanwhile I’ll just be glad there’s no wallpaper.


IMG_2487IMG_2494

So there you have it, a badly lit introduction to our new house!  I hope you will follow along on this journey with us.  It promises to be a huge adventure/challenge.

Hi friends!  It’s been a little while but I can feel the interest and inspiration for decorating & DIY creeping up on me again.  The only difference is that now my decorating budget is even smaller, haha sigh…

When I think of the projects we have going, most of them are creeping forward at a very slow pace – the granny flat, refinishing the windows, various minor house decor tweaks.  Much too boring to blog about.  I have a few awesome things to share in the weeks ahead as I work on some more interesting ideas, but right now  I do have one great project to tell you about – our backyard!

Here’s the motivation for putting a fenced backyard onto our property.

IMG_2772 (1024x768)

She recently turned one, and she’s been walking for two months now.  Baby needs a safe place to roam where I don’t have to be standing over her every second to keep her safe.  Because this is the backyard before.

view toward housebig empty yard

Not really safe for a little one to run around, and so many sharp/dangerous things to climb on or put in the mouth, so the Chief did a blitz backyard 1000% makeover in two weeks.  Two weeks people!!  He is a star.  He just decided that if we were going to make a yard, we were going to put down sod and have it ready for the Cinco De Mayo party we had planned.

Step one: well really step one was install the fence but I forgot to take any pictures.  We got simple 3′ squared off black iron fencing from Home Depot which was one of the cheaper options they had, and also isn’t so enclosing as to stop the sightline to the rest of the property.  The yard still feels big.

Step one that I have a picture of was to put down a truckload of composted chicken manure.  This stuff smelled kind of bad for a few days until all the ammonia had evaporated, but it is the best for growing things – I wish I’d thought to keep some for my veggie garden but when the Chief gets a wild hair he just goes for it till the project is done, and I didn’t really have time to think of that till it was too late.

IMG_0026 (1024x768)

We watched.  It smelled.

IMG_0019 (768x1024)

Later on I helped shovel it around the whole yard with Miss E on my back.  You can see the gate here – a friend made it by hand and the Chief has been storing it in the shed for years now.  Amazingly, it fits perfectly with the rest of our fencing system!

photo 1 (2) (1024x768)

Then the Chief rototilled the manure into the soil so everything was nice and deep and loose for roots to take hold.

IMG_2711 (1024x768)

Lastly, he used a wide pushbroom to make everything flat and level.

photo 5 (1024x768)

I didn’t get pictures of the next two steps, which were laying the sod and putting in the last sections of fence.  It’s important with sod to really wedge the edges tightly against each other when you install it, so that you don’t get gaps or dead edges.  The Chief did a really great job with that.  Lastly, he installed a small area of redwood decking to put the barbecue on and open up the patio, with two redwood steps leading down to the lawn.  It makes such a difference to the finished feel of our yard.

Here’s the patio!  The house exterior has work yet to be done but the yard is soooo amazing already.

backyard after


Here’s another view where you can see how the Chief put in a tall wooden fence with a locking gate in between the shed and our house.  On the other side of that will be the granny flat’s little enclosed front yard, so we’ll both have privacy.IMG_2852 (1024x767)The back yard is amazing and we all use it and enjoy it every day.  We were able to keep costs down by borrowing all the heavy equipment we used and by DIY of course!  Sod cost about 4x what seed would have cost, but the Chief wanted grass for the party and it wasn’t that big an area to do after all.  Now that it’s established it only takes about 4 minutes of watering every day, even in the crazy heat we’ve been having.  Oh yes, the Chief installed the sprinkler system himself too!

Any tips on backyards with little kids and maybe (hopefully) getting in some garden beds?  What have you done to make a haven of your yard for your family?


Hi there! Enter your email address to follow this blog and receive notifications of new posts by email.